How to Auto Assign Chats - Step-by-Step Guide
By Deepika Yadav
With the 'Auto Assign' feature, you can set a special label for an Agent. This label will make sure the agent only sees chats that have that same label.
Here's an example - Let's say there are 100 Chats happening in Live Chat, but only 20 of them are labeled as 'Payment'. Now, you give the label 'Payment' to a particular Agent.
What happens next?
By giving this label, the agent will only work on chats that are also labeled as 'Payment'. So, the agent will only see and work on those 20 chats that are about 'Payment'.
Step 1. Go to the Auto Assign Section
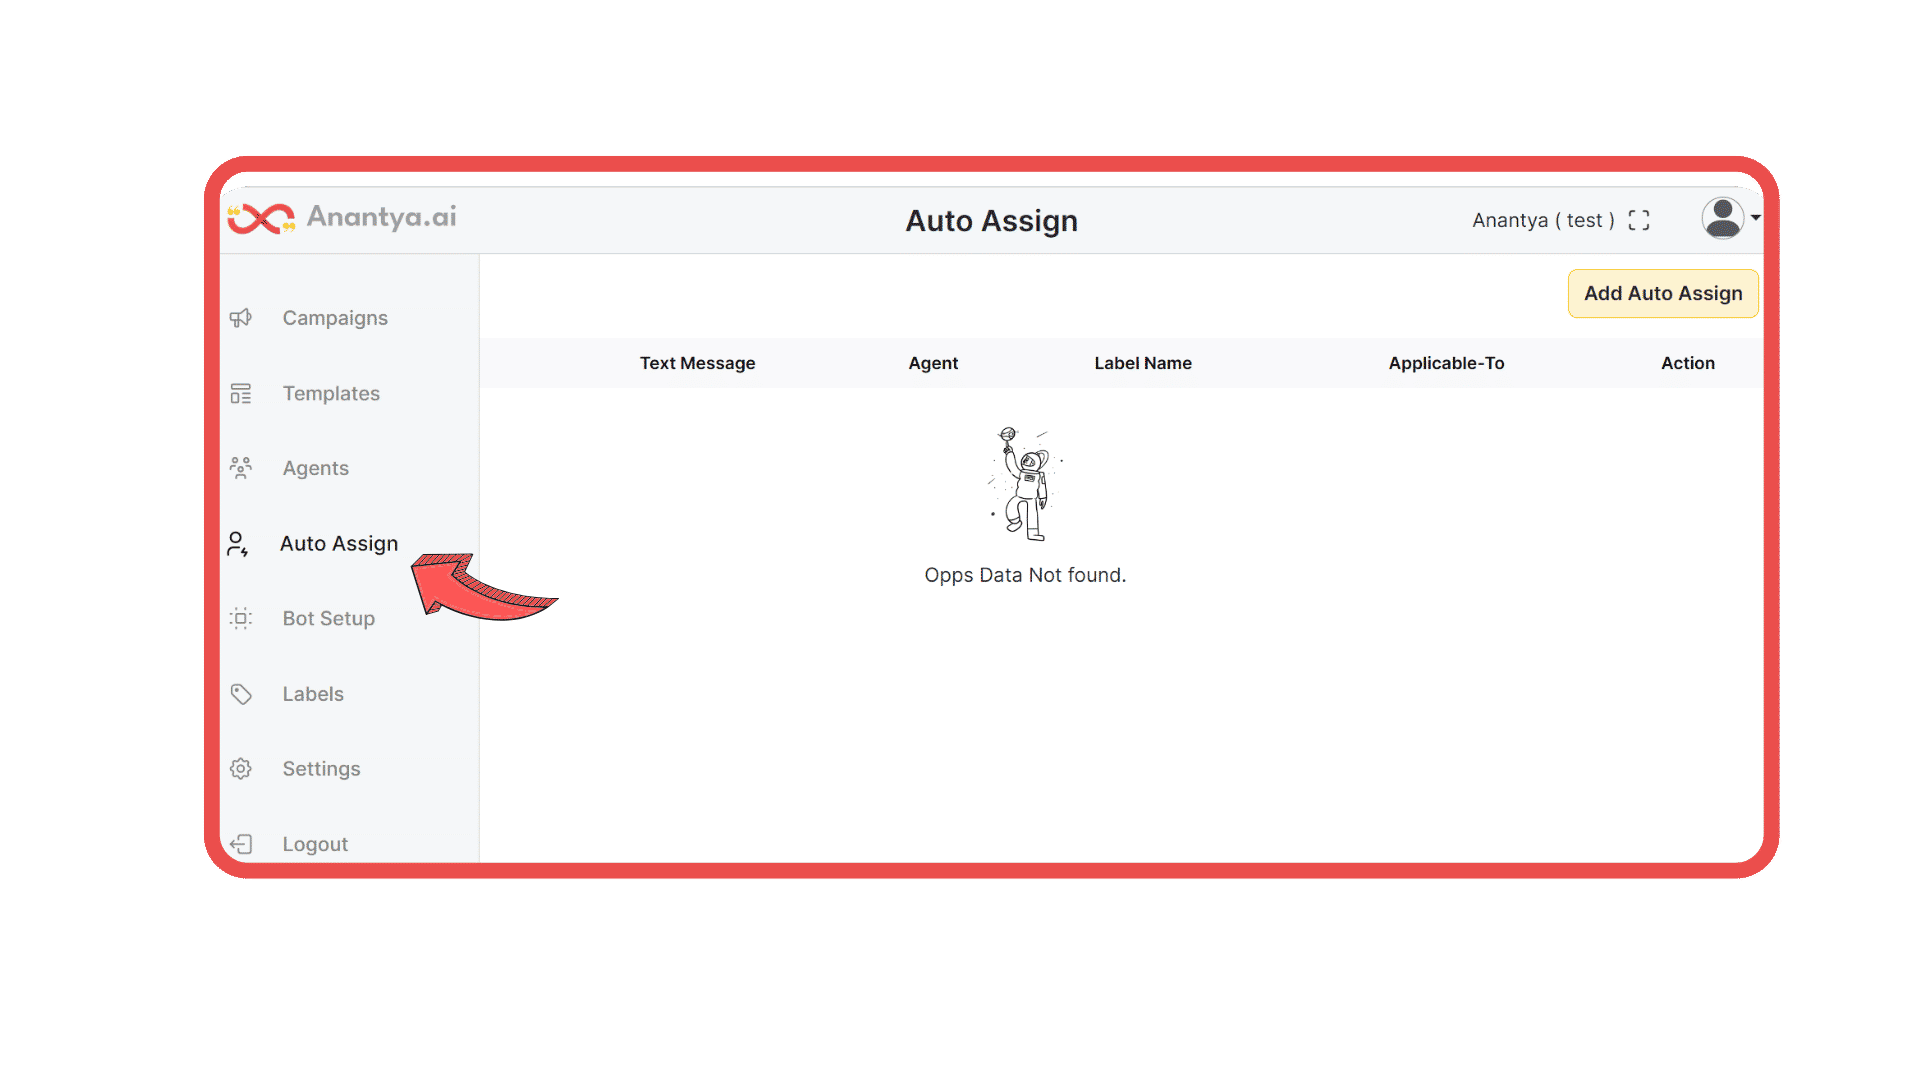
Navigate to Auto Assign: On the left side of the dashboard, you'll find various options. Look for and click on the "Auto Assign" section.
Review Existing Actions: Once you're in the "Auto Assign" section, you might see a list of existing actions if any have been set up previously. If it's your first time using this feature, the dashboard may be empty.
Add a New Auto Assign Rule: In the top right corner of the page, locate and click the "Add Auto Assign" button.

Step 2. Click on Add Auto Assign
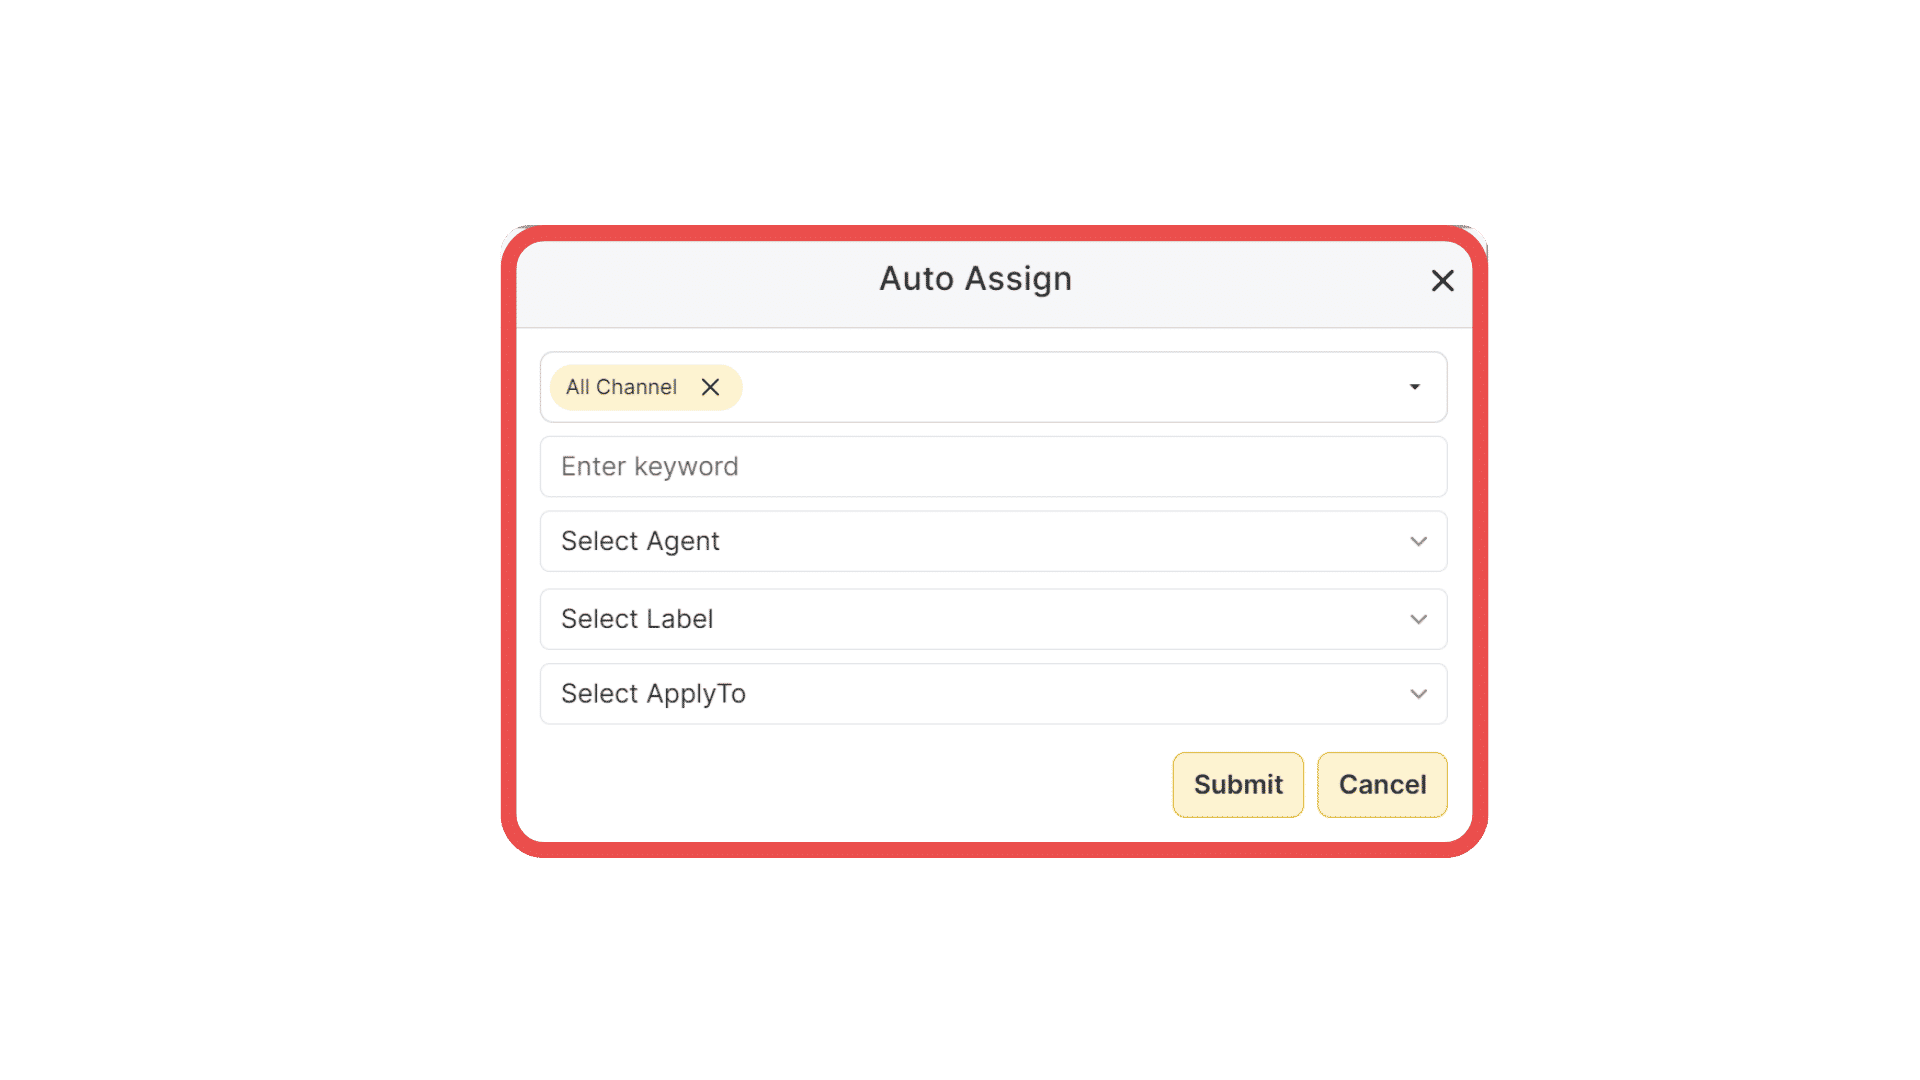
After clicking "Add Auto Assign," a new dialog box will appear. You need to fill the form completely.
Select the Channel: Choose the communication channel for which you want to set up auto assignment.
Choose an Agent: Select an agent from the list of available agents in your system. This agent will be responsible for handling chats that meet the specified criteria.
Assign a Label: Apply a label to this auto-assign rule. Labels help you easily identify and manage different rules. In this case, you can label it as 'Payment' to indicate that this rule is for chats related to payments.
Set Contact Limit: Determine the maximum number of chats you want to auto-assign to the chosen agent. For instance, if you want to limit it to 20 chats, enter "20" in the contact limit field.
Save the Rule: After configuring all the details, review your settings to ensure they are accurate. Then, click the "Save" or "Create" button to save the auto-assign rule.

Step 3: Monitor the Labels and Agents
Monitor Assigned Chats: The agent you've assigned the 'Payment' label to will now only see and handle chats that match the 'Payment' criteria. Regularly check the dashboard to monitor the assigned chats and agent performance.
By following these steps, you can effectively use the "Auto Assign" feature to streamline your chat handling and ensure that the right agent is handling the right chats, leading to improved customer support and efficiency.

