How to Launch Your First Campaign - Step-by-Step Guide
By Deepika Yadav
Launching your very first campaign can be both exciting and a bit overwhelming.
Whether you're trying to promote a product, raise awareness for a cause, or spread the word about an event, here is a step-by-step guide to launch your first campaign.
Step 1: Set Up Your WhatsApp Broadcast Campaign
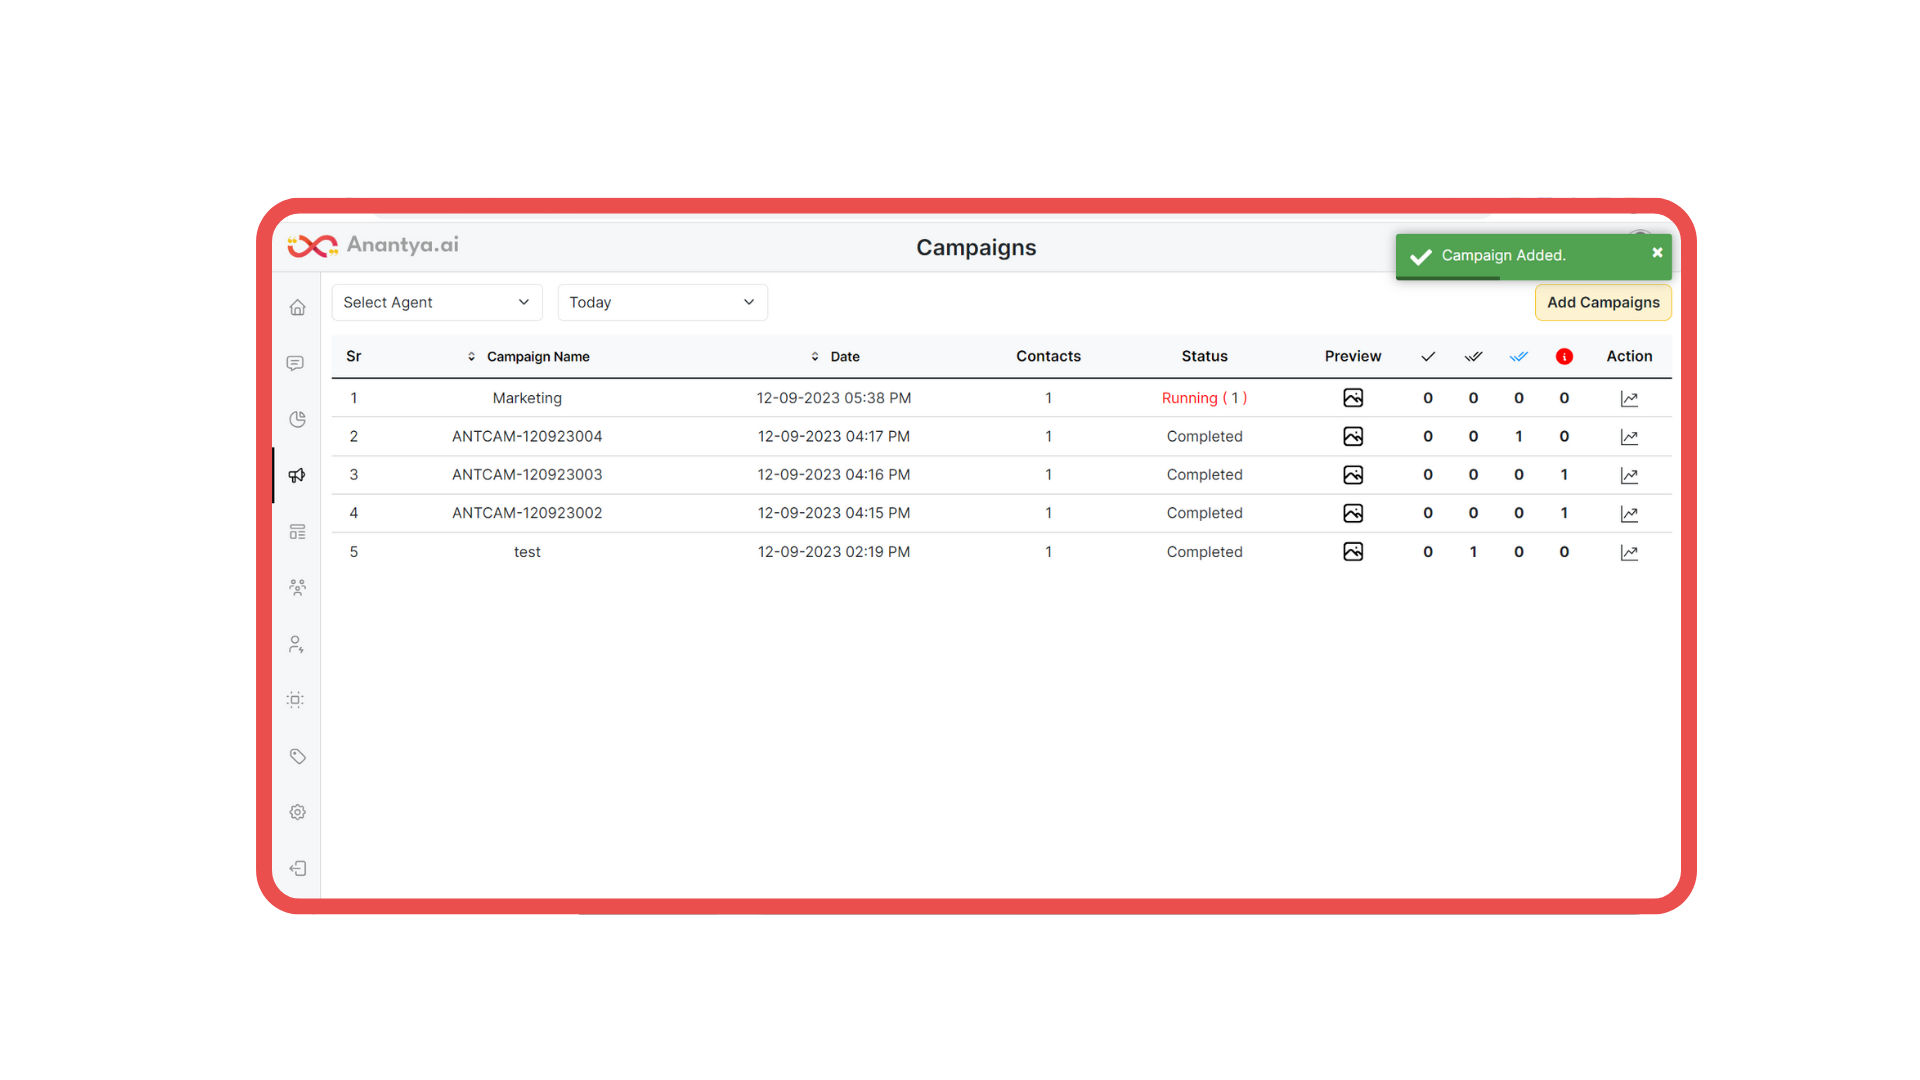
Access the Campaigns Page: Log in to Anantya.ai Panel and navigate to the Campaigns Page.
Create a New Campaign: Look for the "Add Campaign" button located at the top right corner of the page. Click on it to start a new campaign.
Channel and Campaign Name: Choose a meaningful channel name that identifies the purpose of your campaign. Then, give your campaign a clear and concise name that reflects its content.
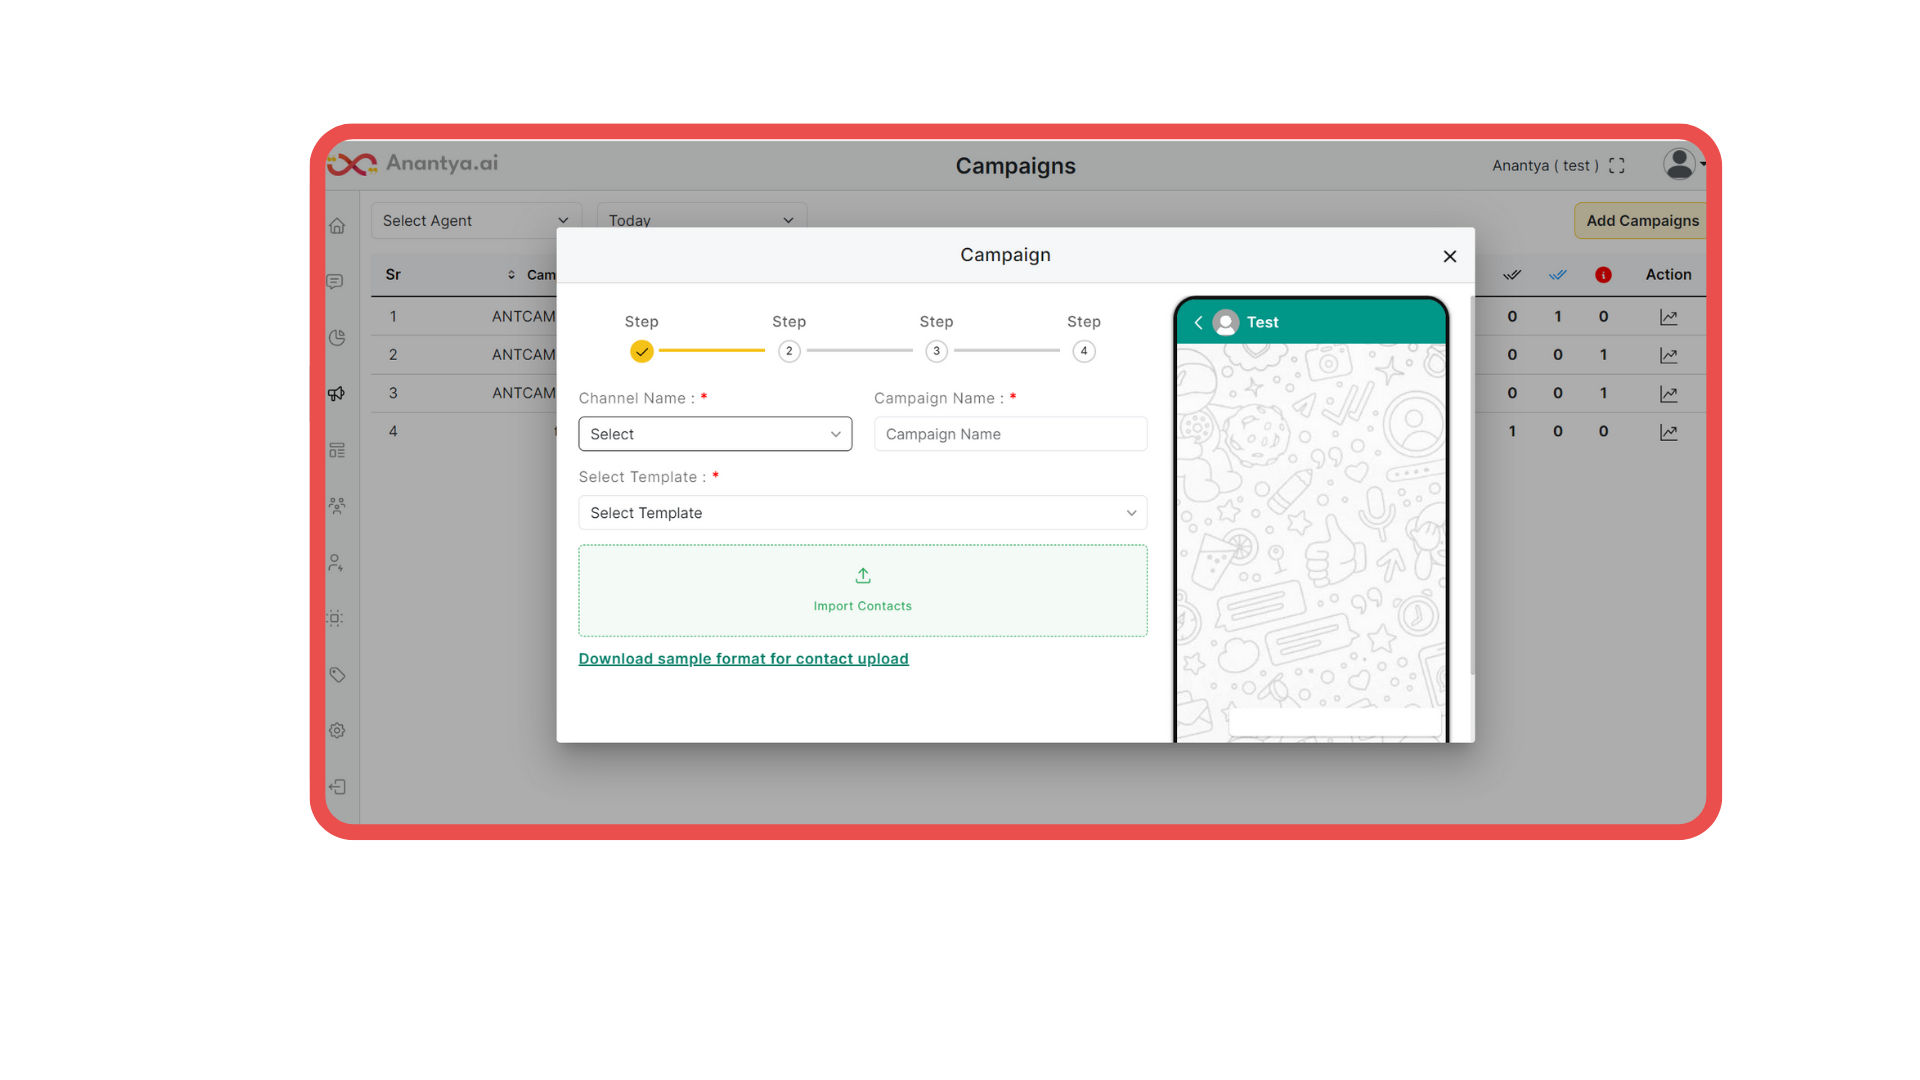
Select a Template: Choose a pre-approved template for your campaign.
Pre-approved Template Messages are the different message templates that you got approved from WhatsApp according to different use cases. This includes Images, Text, Videos, PDFs, CTAs, and Quick Replies.
These messages can be sent to both Active users (who are in the 24 hours window) and Inactive users.
Import or Download Contacts: You have two options for adding contacts. You can import a list of contacts from a file, or you can use a sample format provided by the platform. This list should include the phone numbers of the recipients.
Set Up Campaign: Follow the steps to configure your WhatsApp Broadcast campaign. This may include scheduling the send time, setting up any necessary personalization, and crafting the content of your message.
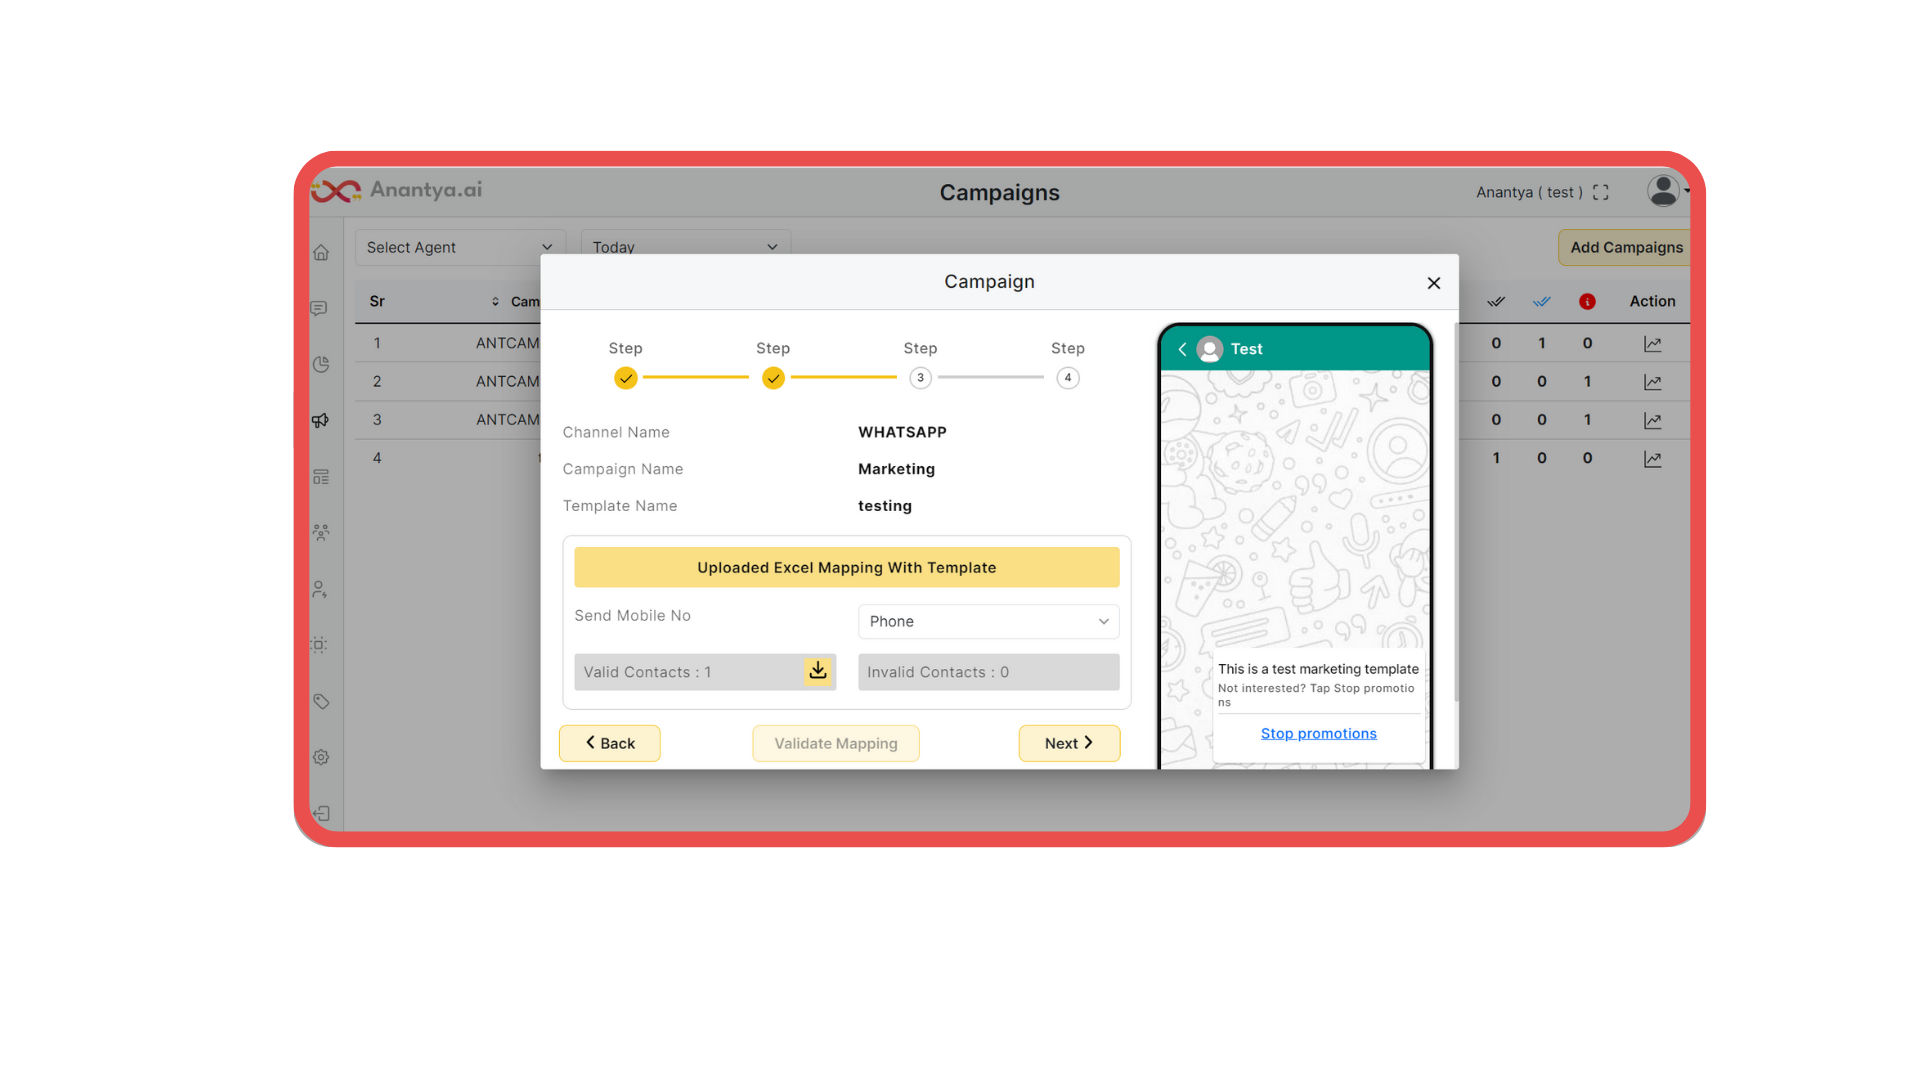
Step 2: Validate and Review Contacts
Select Attributes: This step involves identifying attributes or fields in your contact list that you want to use for personalization. This could include names, locations, or any other relevant information.
Validate Mapping: Ensure that the attributes you've selected match the corresponding fields in your contact list. This step helps avoid errors in personalization.
Check Validity: The platform will display the number of valid and invalid contacts in your list. Review this information to ensure your message reaches the intended recipients.
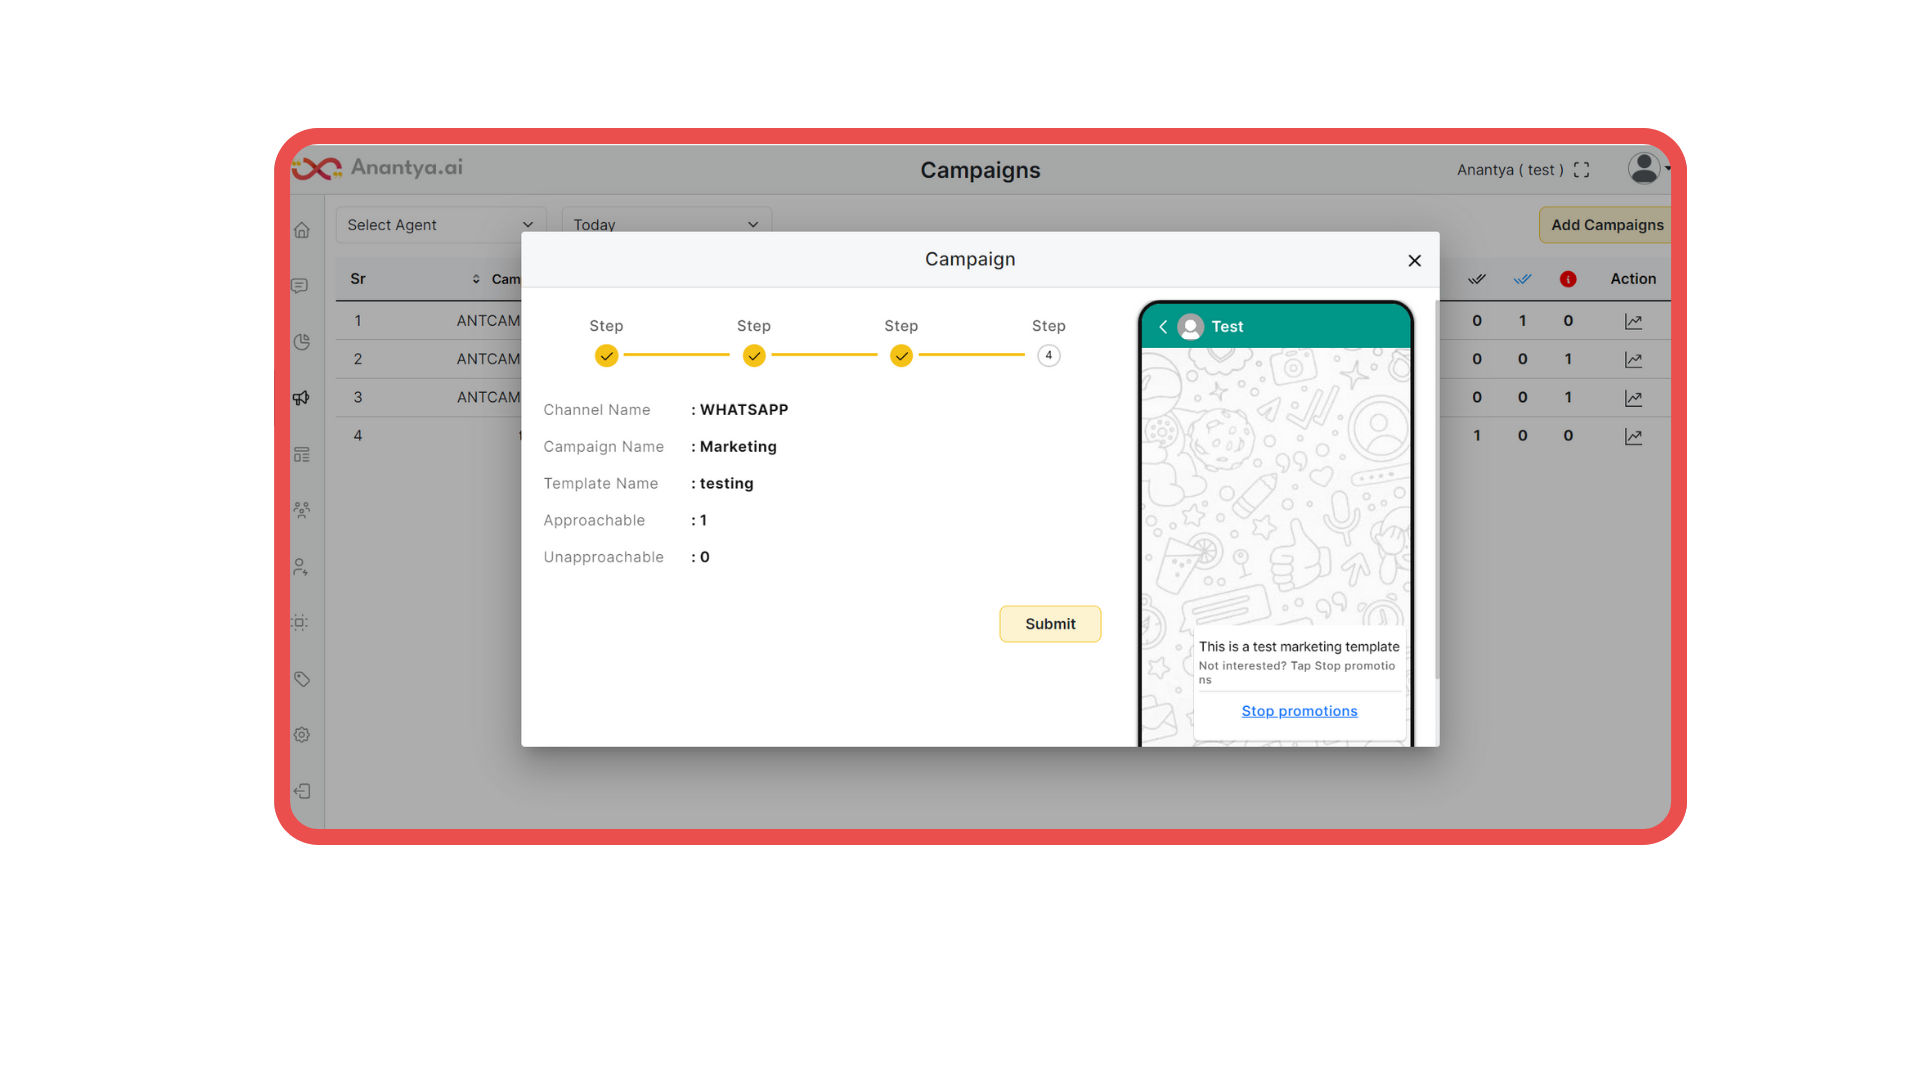
Step 3: Review and Submit
The platform might provide a mechanism to determine the likelihood of recipients engaging with your message. This helps you assess the potential effectiveness of your campaign.
Submit Your Campaign: After reviewing all the previous steps and ensuring everything is set up correctly, click on the "Submit" button to finalize your campaign setup.
Step 4: Monitor and Optimize
Monitor Campaign Performance: Once your campaign is live, monitor its performance through the campaign management platform. Track metrics like open rates, click-through rates, and responses.
Engagement Analysis: Analyze the engagement data to understand which aspects of your campaign are resonating with your audience and which may need improvement.
To know more about how you can monitor your campaigns. Click Here.